5 Exercises That Reverse Faulty Posture
There are five foundational posture exercises that are simple to do at home and effective at counteracting the slouched, rounded posture that builds up from long days of sitting. Below is a clear breakdown of how to perform each one and how to get the most out of it.
The five exercises are:
- Static Back
- Static Wall
- Sitting Floor
- Air Bench
- Standing Wall
A quick note on safety: use your best judgment and choose the exercises that suit your body right now. If any exercise causes pain or discomfort, especially burning, tearing, or shooting sensations, stop that exercise and check with your provider before continuing.
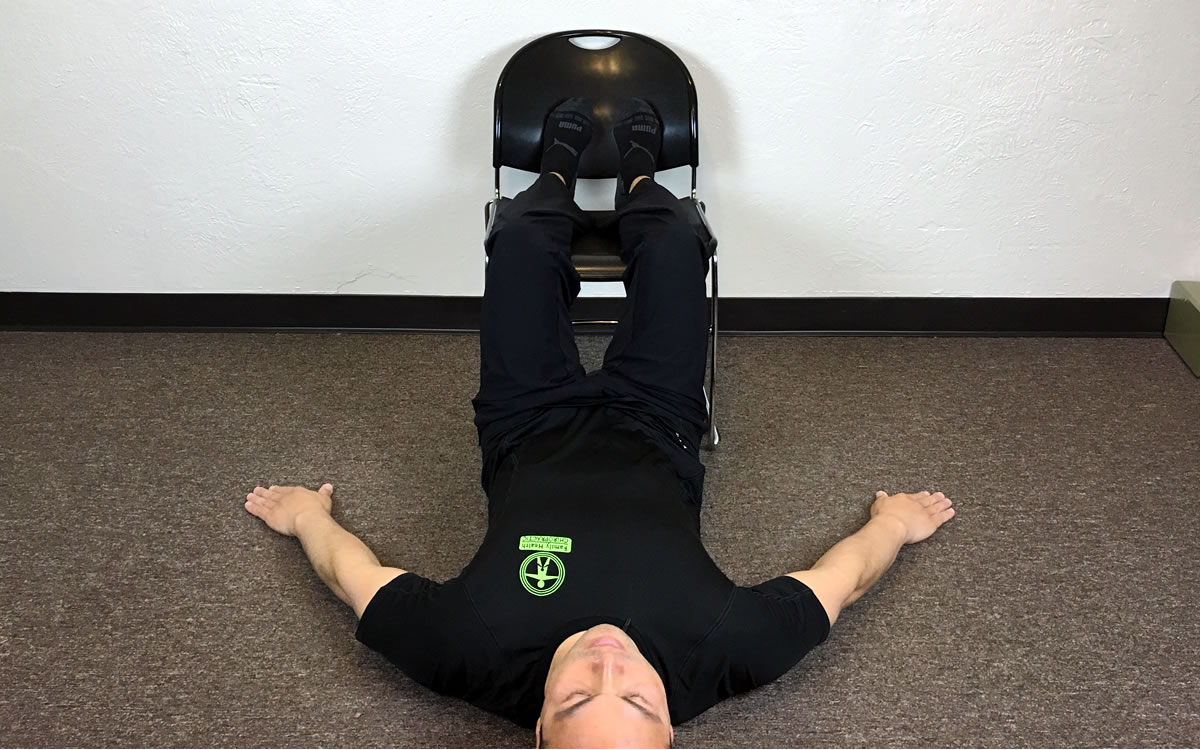
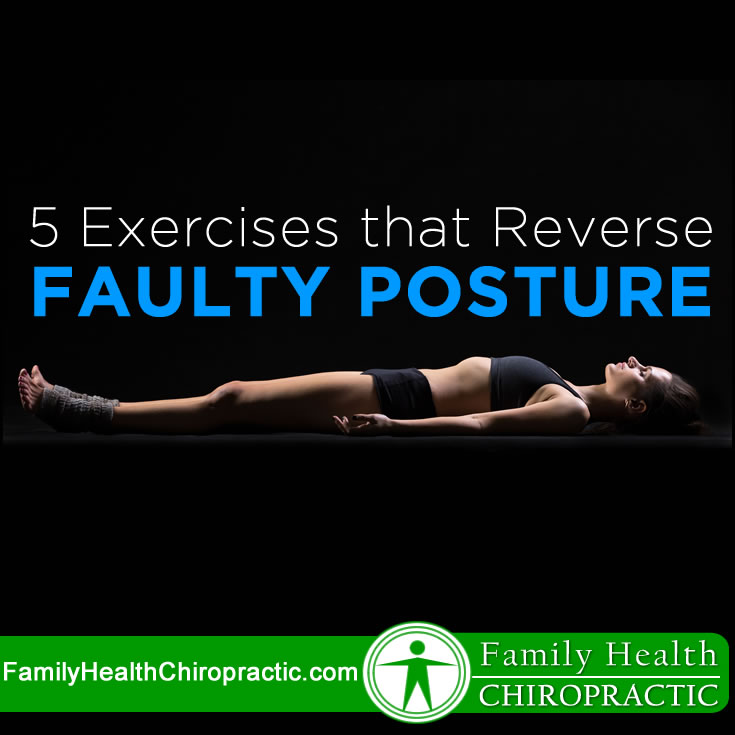
1. The Static Back Exercise
Purpose: Sitting tends to roll the shoulders forward and tighten the lower back. Static Back places the shoulders in the same plane as the hips and lets the lower-back muscles release gradually and passively using body weight and gravity. It encourages the upper back to open against the floor, reversing a slouched position, and when the head rests in line with the shoulders and hips, the neck and jaw begin to release too. So avoid chewing gum or texting during this one.
- Lie on your back with your legs up over a block or chair, keeping your knees and hips at about 90 degrees.
- Place your arms at your sides at roughly 45 degrees from your body.
- Take deep, full breaths and relax.
- Stay here until your low back and hips settle evenly into the floor. This may take five minutes or longer.
If you have been in Static Back for about ten minutes and your low back and hips still are not even on the floor, try the other exercises in this article first, then return to Static Back. Sometimes other areas need to activate or release before the body is ready to settle into neutral.
Modification: If your head does not rest comfortably on the floor, or your chin tilts up and back, place a folded towel under your neck and head for support. The goal is to gradually lower the head all the way to the floor. Keep your arms somewhere between 45 degrees and shoulder height so the shoulders sit neutral and the shoulder blades lie flat. Let the release happen passively rather than forcing your shoulders down. If your knees and feet drift apart, raise the surface your legs rest on with a pillow or folded blanket, and keep your legs around hip-width apart.

2. The Static Wall Exercise
Purpose: Static Wall promotes thoracic extension and lengthens the entire posterior chain (the muscles along the back of your body). It also re-engages the front-side muscles of the lower legs and thighs that switch off during sitting, so keep your thighs tight and your feet pulled back throughout.
- Get on the floor with your hips as close to a wall as possible.
- Bring your legs up the wall, keeping your hips close to the base of the wall.
- Lie back with your legs pointed straight up, upper body relaxed, arms out to the sides at about 45 degrees. Feet should be hip-width apart, about one and a half fist widths.
- If your hips lift off the floor, scoot back until your hips rest flat. Over time they will sit closer to the wall while staying flat.
- Hold for 2-4 minutes.
In this position, tighten your thighs and pull all of your toes down and back evenly toward your face, with your feet pointing straight out from the wall. Modification: If your tailbone will not rest flat even after scooting back 6-12 inches, do more spine and pelvic extension work before returning to this exercise. The most common mistake is letting the feet turn out, so keep the outer edges of your feet pulled back and the feet pointing straight. Doing this exercise correctly for a shorter time is better than doing it incorrectly for longer.

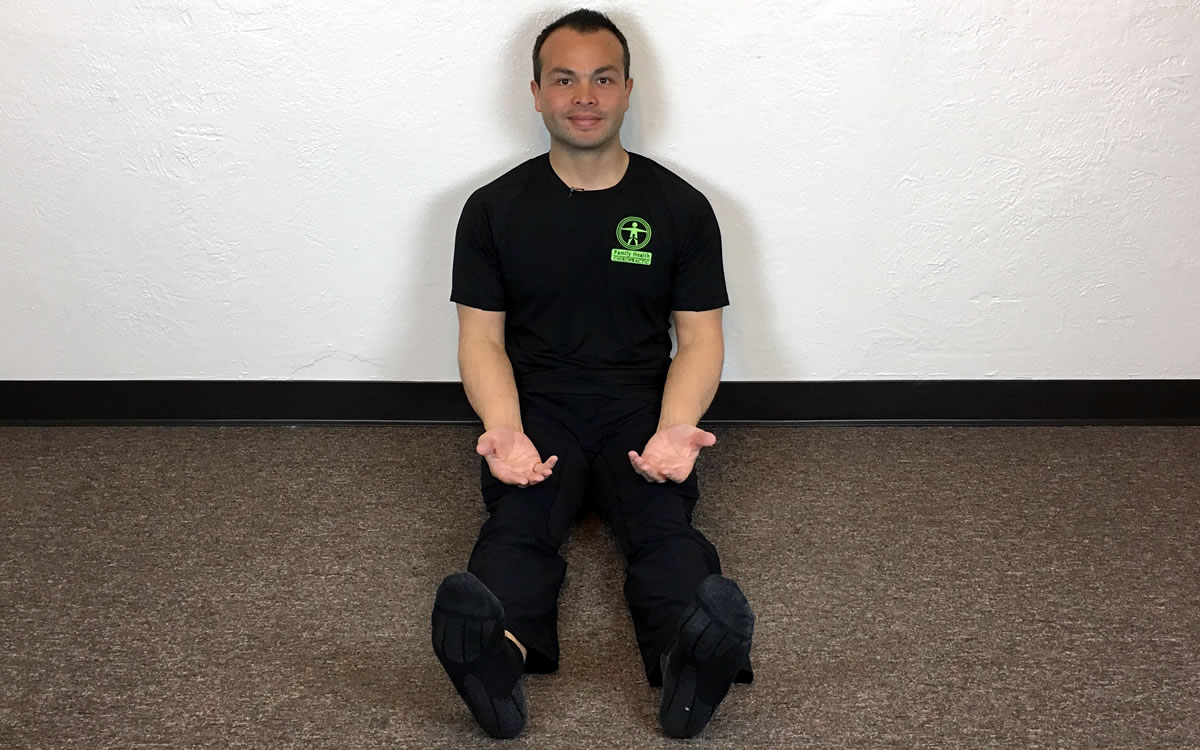
3. The Sitting Floor Exercise
Purpose: This targets the muscles of the upper back and shoulders that hold you upright, and it re-engages the front-side leg muscles that fade with too much sitting. Keep your thighs tight and your feet pulled back. For an added challenge, try lifting your heels slightly off the floor by fully extending the knees.
- Sit against a wall with your legs straight out in front of you, keeping your buttocks and upper back against the wall the whole time.
- Squeeze your shoulder blades together and down and hold. Tighten your thighs and flex your feet back so your toes point toward you.
- Hold for 1-3 minutes.
Modification: If you cannot get your hips all the way back to the wall, start with Static Back and Static Wall first, since this is a progression from those. If you find yourself lifting your sternum or over-arching your back to bring the shoulder blades together, drop your rib cage so your low back rests flat against the wall, then pull the shoulder blades down and together, tuck your chin, and breathe deeply. This exercise takes real effort, so be patient and keep scanning your body for the key points: feet pulled back, thighs tight, rib cage neutral, shoulders back and down, chin tucked, and steady breathing.
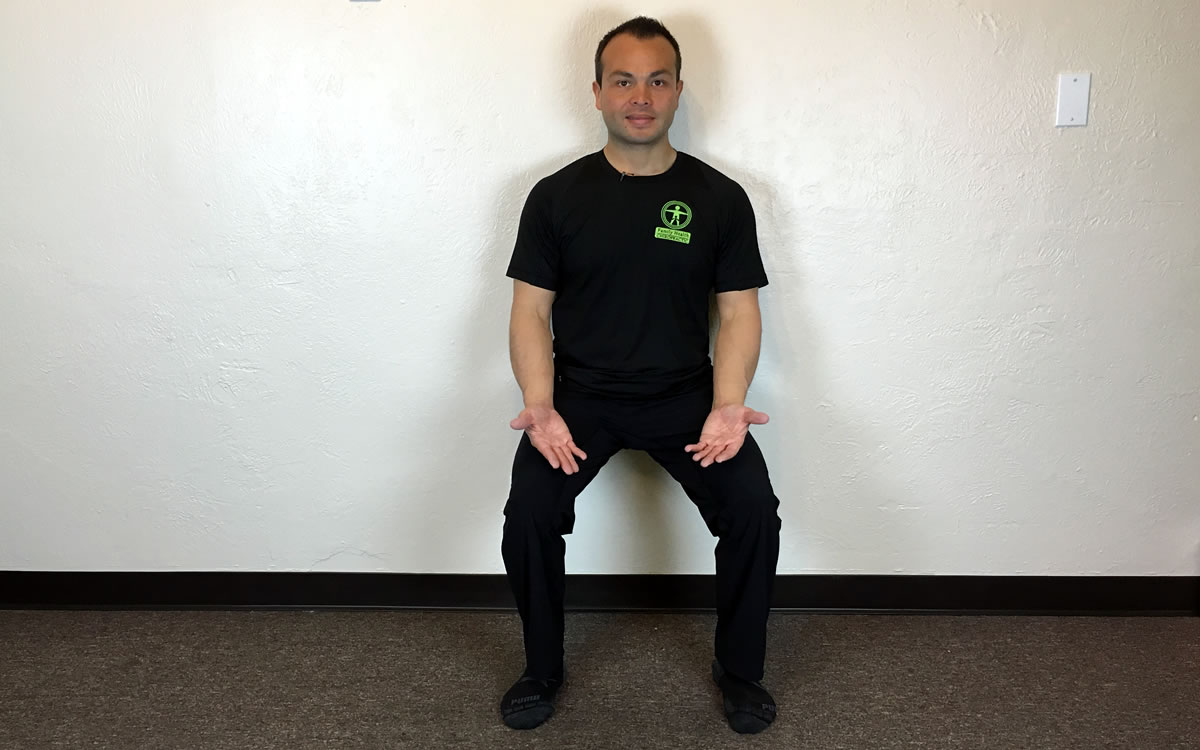
4. The Air Bench Exercise
Purpose: Air Bench helps reduce rotation of the pelvis and resets the low back. Keep your feet, knees, and hips even. If one knee juts out ahead of the other, your pelvis is rotated, so push both sides of your pelvis evenly into the wall until your knees line up before starting your timer. Keep your low back flat against the wall throughout so the low-back muscles can relax.
- Stand with your back against a wall, feet and knees hip-width apart and feet pointing straight, with about one and a half fist widths between your ankles and knees.
- Walk your feet away from the wall while sliding your body down, as if sitting in an invisible chair, knees bent to about 105 degrees.
- Keep your hips slightly higher than your knees and your ankles slightly ahead of your knees, with your low back completely flat against the wall.
- Hold for 30 seconds to start, working up to 2 minutes.
Keep your weight in your heels and avoid pressing onto your toes. Wear shoes or stand on a non-slip surface like a yoga mat. Modification: If your knees hurt, raise your hips a little higher and make sure your ankles are ahead of your knees and that your ankles, knees, and hips are aligned. You should feel the work evenly in both quads. If knee pain persists, do Static Back, Static Wall, and Sitting Floor first, then return to Air Bench when ready. Do not worry about your head and shoulders at first; getting the low back flat is the priority, then bring your shoulders and head back to the wall while keeping the spine flat.
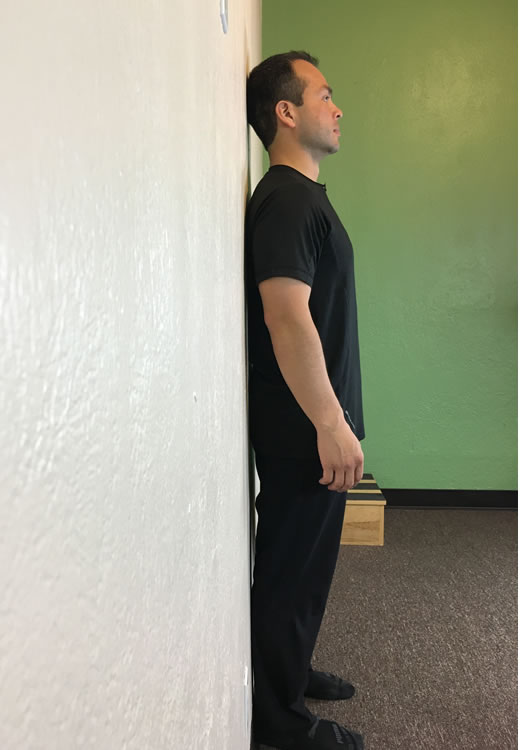
5. The Standing Wall Exercise
Purpose: This is the go-to posture-training move. It helps align the major load-bearing joints (shoulders, hips, knees, and ankles) and works the postural muscles from your feet to your neck. Many people feel how deconditioned these muscles are the first time they try it.
- When possible, do this barefoot.
- Stand against a wall with your feet pointing straight ahead and hip-width apart (about a fist and a half between your heels).
- Stand with your heels, hips, and shoulders touching the wall, eyes looking straight ahead to the horizon. If putting your head back makes you look at the ceiling, leave it forward for now; it will move back over time as your upper back changes.
- Relax your stomach and arms and let your body adjust. Hold for 2-3 minutes.
Modification: If your heels will not touch the wall, start with them 2-3 inches away and gradually progress. For an added challenge, bring the backs of your hands to the wall with fingers spread wide and arms at 45 degrees, which works the upper back and shoulders.
Make It a Daily Habit
Work these exercises into your daily routine. Gravity is constant, and most of us simply do not move enough during the day to keep our bodies functioning at their best. Done consistently and correctly, these five moves help restore healthy joint alignment and posture over time.
READY TO FEEL BETTER?
Book Your Appointment Today
Same-week appointments are often available. Call 512-347-8881 or request a time online.